
Chin Lee
Resizing EC2 Micro Instance Volume
Published Mar 29, 2012
My EC2 micro instance volume growing fast and it comes to a critical level now:
$ df -h
Filesystem            Size  Used Avail Use% Mounted on
/dev/xvda1            7.9G  7.2G  343M  96% /
udev                  289M  4.0K  289M   1% /dev
tmpfs                 119M  164K  119M   1% /run
none                  5.0M     0  5.0M   0% /run/lock
none                  297M     0  297M   0% /run/shm
Took me some time to upgrade the volume and would like to share with all.
Resizing Volume in EC2
First, login onto AWS Management Console, navigate to EC2 tab, and follow by Elastic Block Store > Volumes.
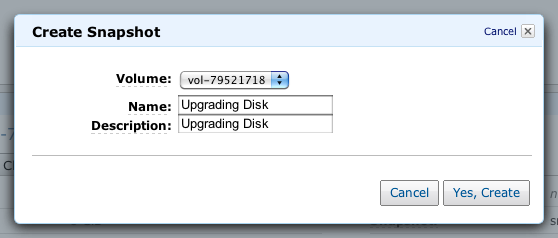
Create a snapshot from the volume by giving a name and a description.
Next, nagivate to Elastic Block Store > Snapshots and wait for the progress to be done.
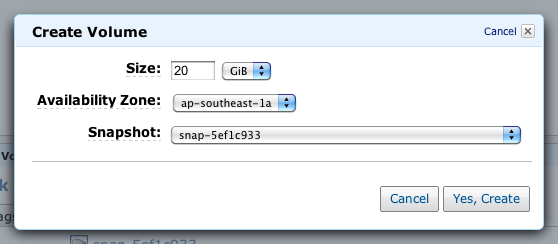
After the progress is done, create a volume from the snapshot by giving a new size.
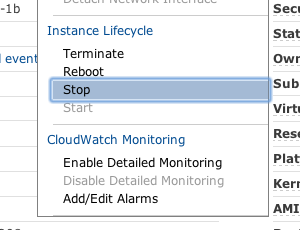
Next, you will need to shutdown and stop your instance before you can detach the old volume and attach the new volume.
$ sudo shutdown now
Navigate to Instances to stop your instance. (Stop means Stop, not Terminate or your instance will be gone)
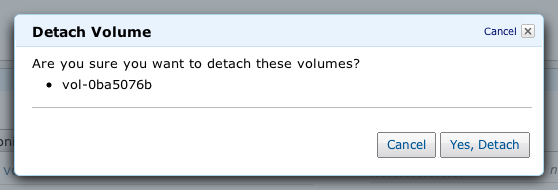
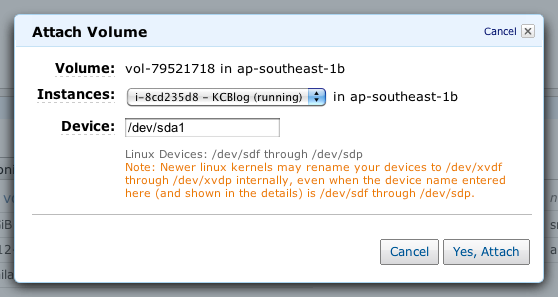
After a while, go back to Volumes and write down your in-use volume’s attachment information; where my Ubuntu’s volume is attached to /dev/sda1.
Next, detach the old in-use volume and attach the newly created available volume.
Start your instance again from Instances.
Login into shell before proceeding to the last step.
$ sudo resize2fs /dev/xvda1
After a short while, you are done!
$ df -h
Filesystem            Size  Used Avail Use% Mounted on
/dev/xvda1             20G  7.2G   12G  39% /
udev                  289M  4.0K  289M   1% /dev
tmpfs                 119M  164K  119M   1% /run
none                  5.0M     0  5.0M   0% /run/lock
none                  297M     0  297M   0% /run/shm